If you are like many small business owners, then you are probably using Phone.com in tandem with your cell phone that also takes your personal phone calls throughout the day.
Phone.com has a great set of feature selections that will allow you to identify callers that dialed your Phone.com number rather than your personal line. They include:
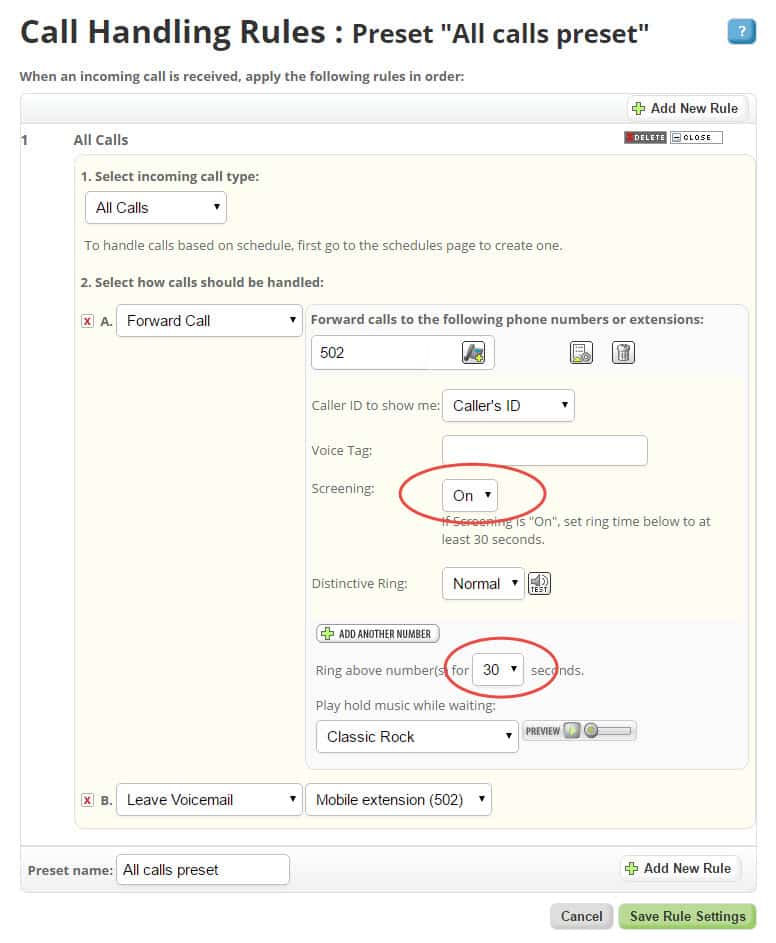
- Call Screening: When you answer the call it will announce the caller’s ID, the called number, and the option to press 1 to accept or 2 to reject the call. While you are listening to this announcement the caller hears your selected ring tone.
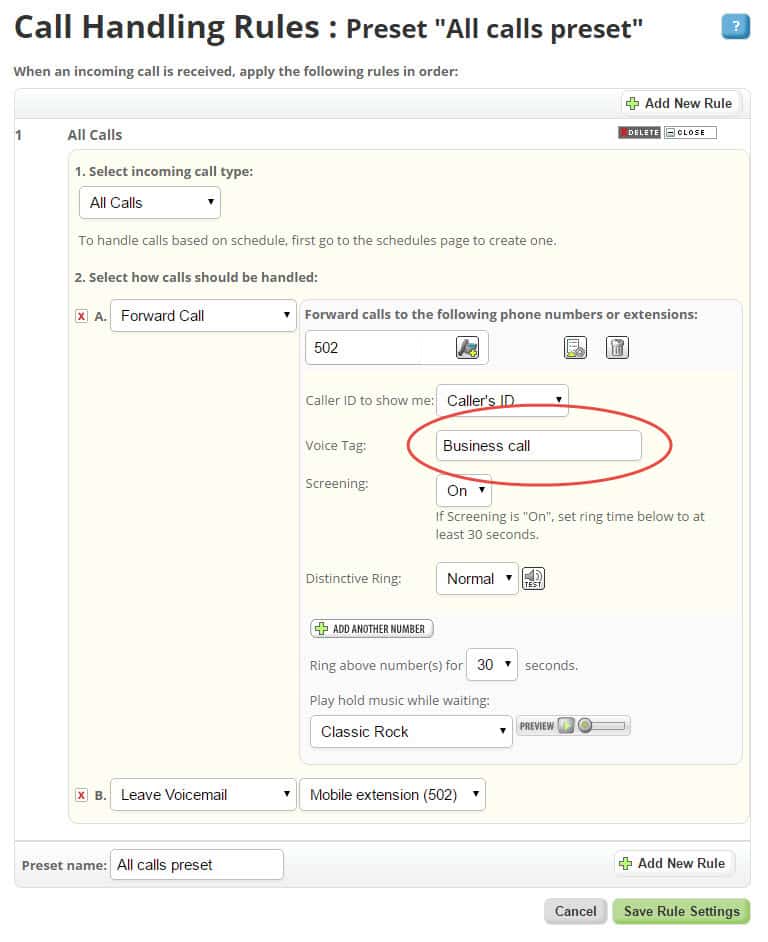
- Voice Tag: When you answer the call the voice tag will play that you specify in your settings. For example, if you enter “Business Line” for your voice tag, upon answering the call you will hear “Business Line” and then the call will connect. The caller will not hear this voice tag.
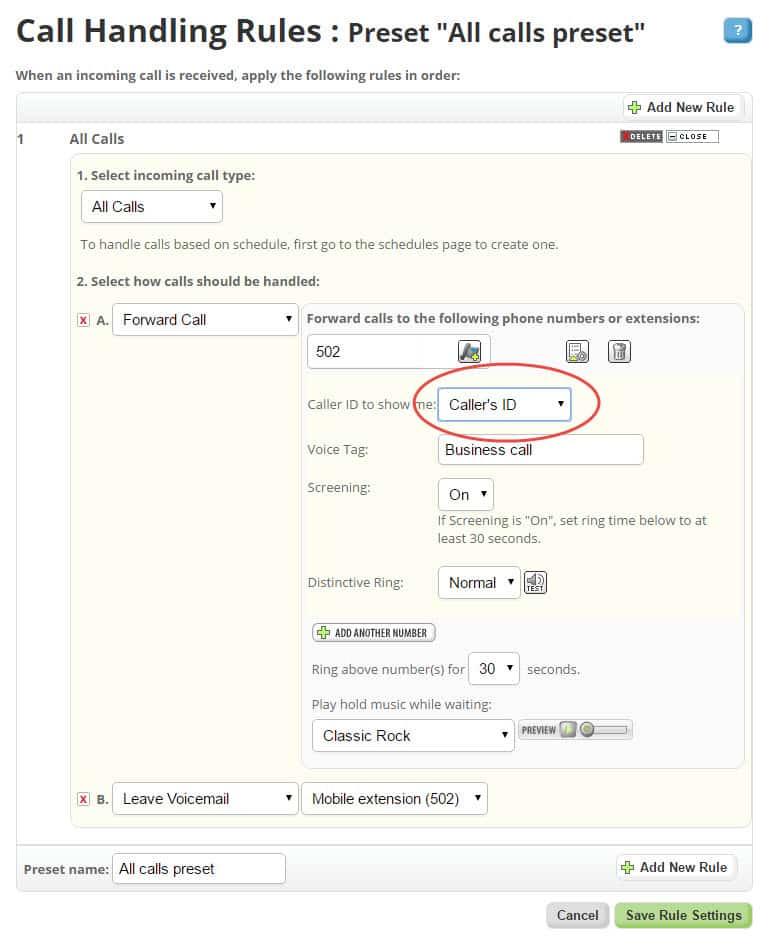
- Incoming Caller ID: This allows you to display the incoming caller ID as either the caller’s number or the Phone.com number they called.
All of these settings are activated in your Call Handling Rules, which can be found in various locations on your account such as from your phone number settings, extension settings, or menu settings. In the examples below I will be referencing them from the phone number settings.
These instructions assume that you already have your call forwarding settings established. If you do not, please see our guide on How to Forward Your Number.
Activating Call Screening
- Mouse over Configure and select Manage Numbers.
- Select Edit for your Phone.com number.
- Select Edit for Number Action.
- Next to your Forward Call action, select the Advanced Menu icon (has a green arrow and gear widget).
- Set Call Screening to On.
- Set your Ring above number(s) for setting to at least 30 seconds.
- Select Save Rule Settings.

Activating Voice Tag
- Mouse over Configure and select Manage Numbers.
- Select Edit for your Phone.com number.
- Select Edit for Number Action.
- Next to your Forward Call action, select the Advanced Menu icon (has a green arrow and gear widget).
- Enter your desired text in the Voice Tag field.
- Select Save Rule Settings.
Setting Your Inbound Caller ID
- Mouse over Configure and select Manage Numbers.
- Select Edit for your Phone.com number.
- Select Edit for Number Action.
- Next to your Forward Call action, select the Advanced Menu icon (has a green arrow and gear widget).
- Choose your desired caller ID in the Caller ID to show me field.
- Select Save Rule Settings.

That covers everything you need to know about screening your business calls! See you next Monday for some more Phone.com knowledge.

